I'm certain by this time, there's probably a million photos of the Perigee moon also known as the "Super Moon".
I had been messaged several times this evening if I was taking shots of the super moon and I of course joked that I can uprez one of my old photos with Photoshop by 14% pretty easily.
But this isn't just about photographing the moon, but on how stacking is done.
 |
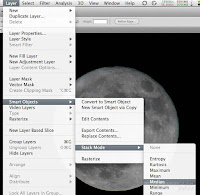
| Figure 1. |
First off, from my experience, the best shots of the moon is to find the sharpest aperture on your lens, which is usually safe to say, F/8 and then you need some shutter speed. The moon moves pretty fast, so ideally you want to be somewhere in the 1/400 of a sec or better. This will usually mean that you need to turn up your ISO. But there's a slight catch to doing this, the higher your ISO, the more noise you introduce.
This is where stacking multiple images comes in. The idea of stacking is to bring several images together and by a process called Median averaging, you basically average out several images of noise.
Step 1: Depending on what program you use, you'll want to open up all your images into Photoshop. If you used Lightroom, you can tell the images to open into Photoshop as layers as demonstrated by Figure 1. Select all the layers in the layers palette.
 |
| Figure 2. |
 |
| Figure 3. |
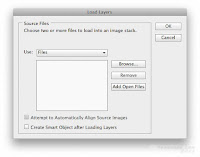
Step 1a: Conversely you can open individual files into Photoshop and then open the
Scripts option under the
File menu command and choose
Load Files into Stack... (Figure 2). Choose Add Open Files or you can browse and add them into list. Click on the checkboxes for both "Attempt To Automatically Align Source Images" and "Create Smart Object after Loading Layers". Skip to Step 4.
 |
| Figure 4. |
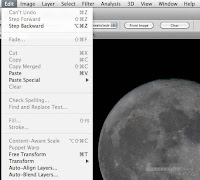
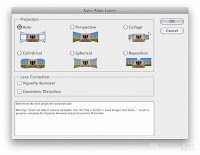
Step 2: Once you've selected all the layers, go to the
Edit menu and scroll down and select
Auto-Align Layers... (look at figure 3 & 4). Leave all the settings on defaults and make sure that the check boxes for
Vignette Removal and
Geometric Distortion is off.
 |
| Figure 5. |
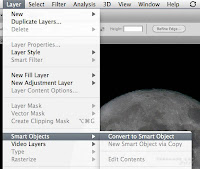
Step 3. Under the
Layer menu, select
Smart Objects and the submenu
Convert to Smart Object (Figure 5.).
 |
| Figure 6. |
Step 4. You should end up with single layer with an icon as displayed in Figure 6. The little document icon show's that it is now a smart object.
 |
| Figure 7. |
Step 5. Select the
Layer menu again and under
Smart Objects you'll have access to another menu called
Stack Mode (look at Figure 7.). Select
Median and after a little bit of a wait, it should be apparent that most noise has been eliminated.
You should end up with a result that is sharp and relatively noise free. It should be pointed out that if you're dealing with a slow moving object, you should take as many consecutive shots as possible to avoid any misalignment of your multiple images.
The final results can be adjusted with a slight contrast adjustment and slight sharpening in Lightroom:
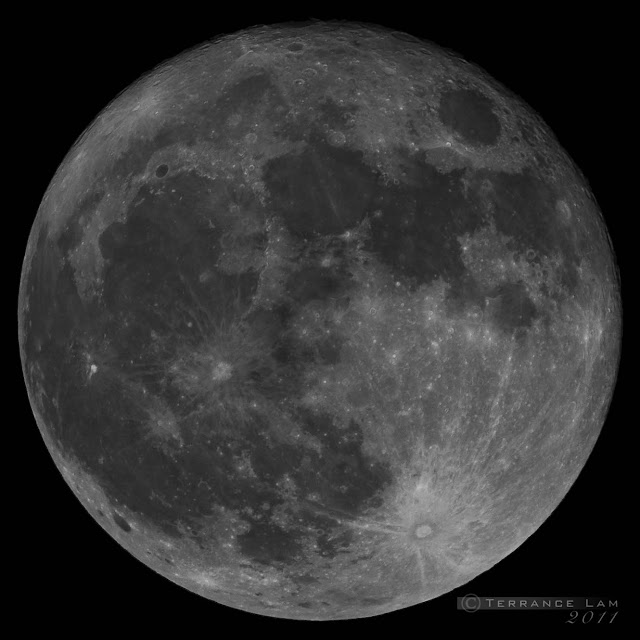 |
| The 12 images stacked (This was reprocessed with less sharpening applied 03-20) |
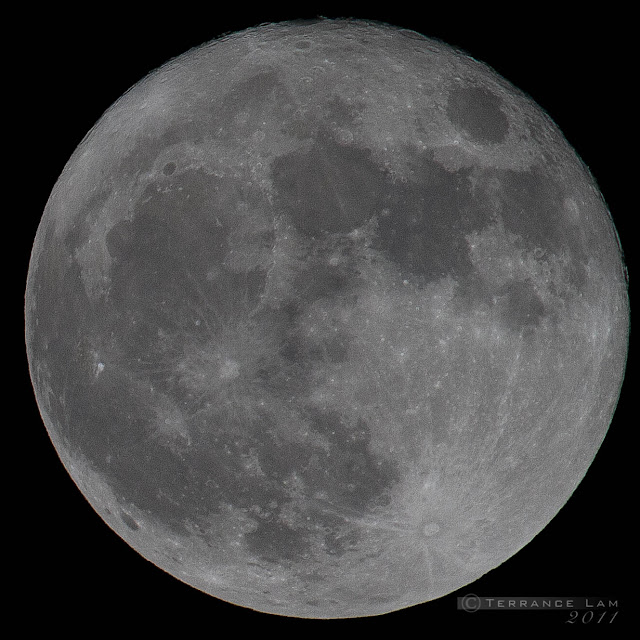 |
| Single Image for reference before stacking and processing |


The result looks great, although it would be nice to see some of the source images to get a bit more understanding of what the stacking process achieved.
ReplyDeleteIn my my opinion, the problem with unsharp masking is that it gives sharpened objects a bit of a bright halo with a quick falloff that gives it a signature black and white newspaper look. I'm curious how did the image looks without unsharp masking?
Yeah I agree Nick on the unsharp mask. I generally don't like to use it but I got lazy since I was in Photoshop and one of the problems with Median averaging is that it can tend to soften up a few things so a slight unsharp mask is necessary. I've reprocessed it and did not use unsharp mask. A contrast adjustment and slight sharpening was applied in Lightroom and re-uploaded. Now shows a lot more details, without the noise.
ReplyDelete