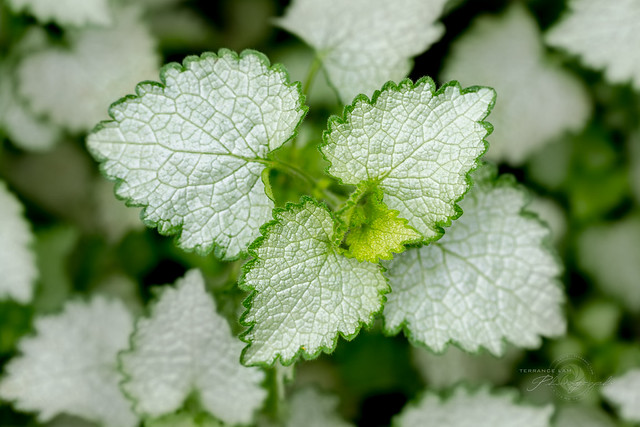
Today's tutorial will demonstrate how I use adjustment brushes in Lightroom 4 to enhance the depth of field in an image. This can also be used for images that were captured with far smaller apertures than the more expensive F/2.8 lens over the more inexpensive F/3.5-F/5.6 lenses. Even in figure 1, I may have used my 100mm F/2.8 macro lens, but I shot it at F/5 so I could get more of my central subject in focus.
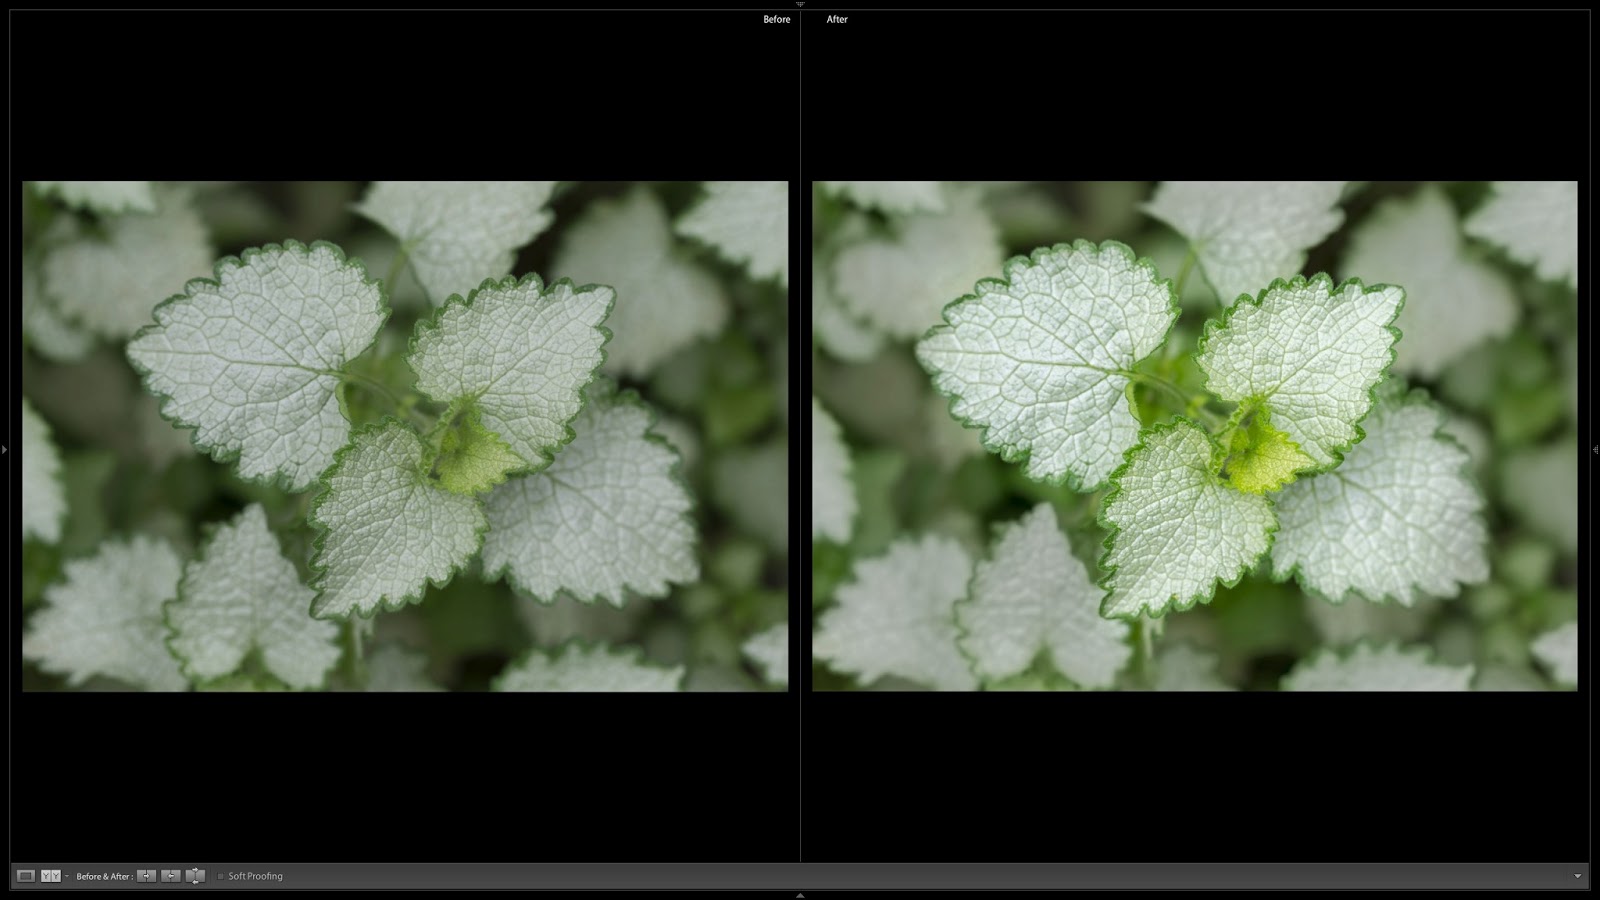 |
| Figure 1: Before and After. ISO 100, 1/80 sec, F/5 |
I choose to enhance an image afterwards because I want to either enhance the depth of field and bring more focus to my central subject in focus. The effect is usually pretty subtle, but just enough to draw the eye in.
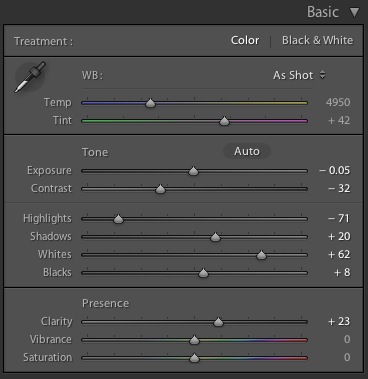 |
| Figure 2. Baseline adjustments |
Often I choose to use vignette to help draw the eye centrally, but by using the adjustment brush I can better control an effect and with more control. Lightroom 5 will be introducing some interesting ways to enhance images with the new radial gradients, but painting the effect in the right areas is still going to get more favourable results.
Before I begin to paint my effect, I adjust my image initially to give me the most favourable conditions for this technique.
I generally start by dropping my exposure and contrast and recover that back with the highlight, shadows, whites and blacks. I increase the clarity and also the sharpening settings to taste before I apply the adjustment brush. Be aware that you might be coming back into these settings later to do further tweaking for the effect. You might find that some further adjustments are made with the contrast of your image.
 |
| Figure 3. Adjustment Brush and Settings |
The adjustment brush is found in the tool palette just above your basic adjustment tools. This tool is often under utilized, but a very powerful tool in Lightroom 4. I do warn people that it is a little processor intensive, so if you have a slow computer it might slow things down. This is normal on slower computers so be aware nothing is broken on your system.
Select the brush and before painting the areas you want to apply the effect, adjust your settings for the brush. I generally move the exposure down and turn the contrast right down to -100 for starters. I then crank the highlight settings all the way over to 100. This will deliberately over expose the area I paint the effect on, simulating to a degree, bokeh. The shadow adjustment is completely subjective. You can either adjust it up or down depending on your image. In this example I actually decided to darken it a little. Next I reduce the midtone contrast in the Clarity settings. Be cautious not to overdo this setting. You can certainly crank it way over and it starts to look more like a bad hazy lens, but just a small adjustment is recommended. Another subjective choice is to desaturate the area. Since you'll be painting likely the background for the effect and preserving the foreground, this gives you the opportunity to desaturate the background a touch. Lastly, I crank the sharpen settings down to -100, and increase both the noise and moire adjustments to +100. Increasing noise reduction gives me a little more blur, as does moire. Both are very subtle in this case and if you have a noisy image to begin with, you might be cautious how far you make the adjustment in the noise reduction slider.
As far as brush settings. make sure you have a pretty large feather setting for it. You can turn on or off Auto Mask (most times I find it in the way). I usually keep it off as it sometimes creates undesirable masked areas that don't show a nice smooth transition.
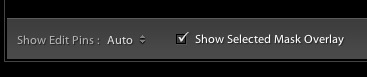 |
Figure 4. Mask display modes
hitting 'O' key will toggle |
Before or as you paint have your mask display mode turned on. This is found in the bottom left corner of the preview. As you use the brush, the computer will slow down and having the mask overlay on will slow it further. Remember the 'O' key shortcut to toggle this on and off. Not only does this show where you'll be painting, but it is much easier to see the effect when you turn it off.
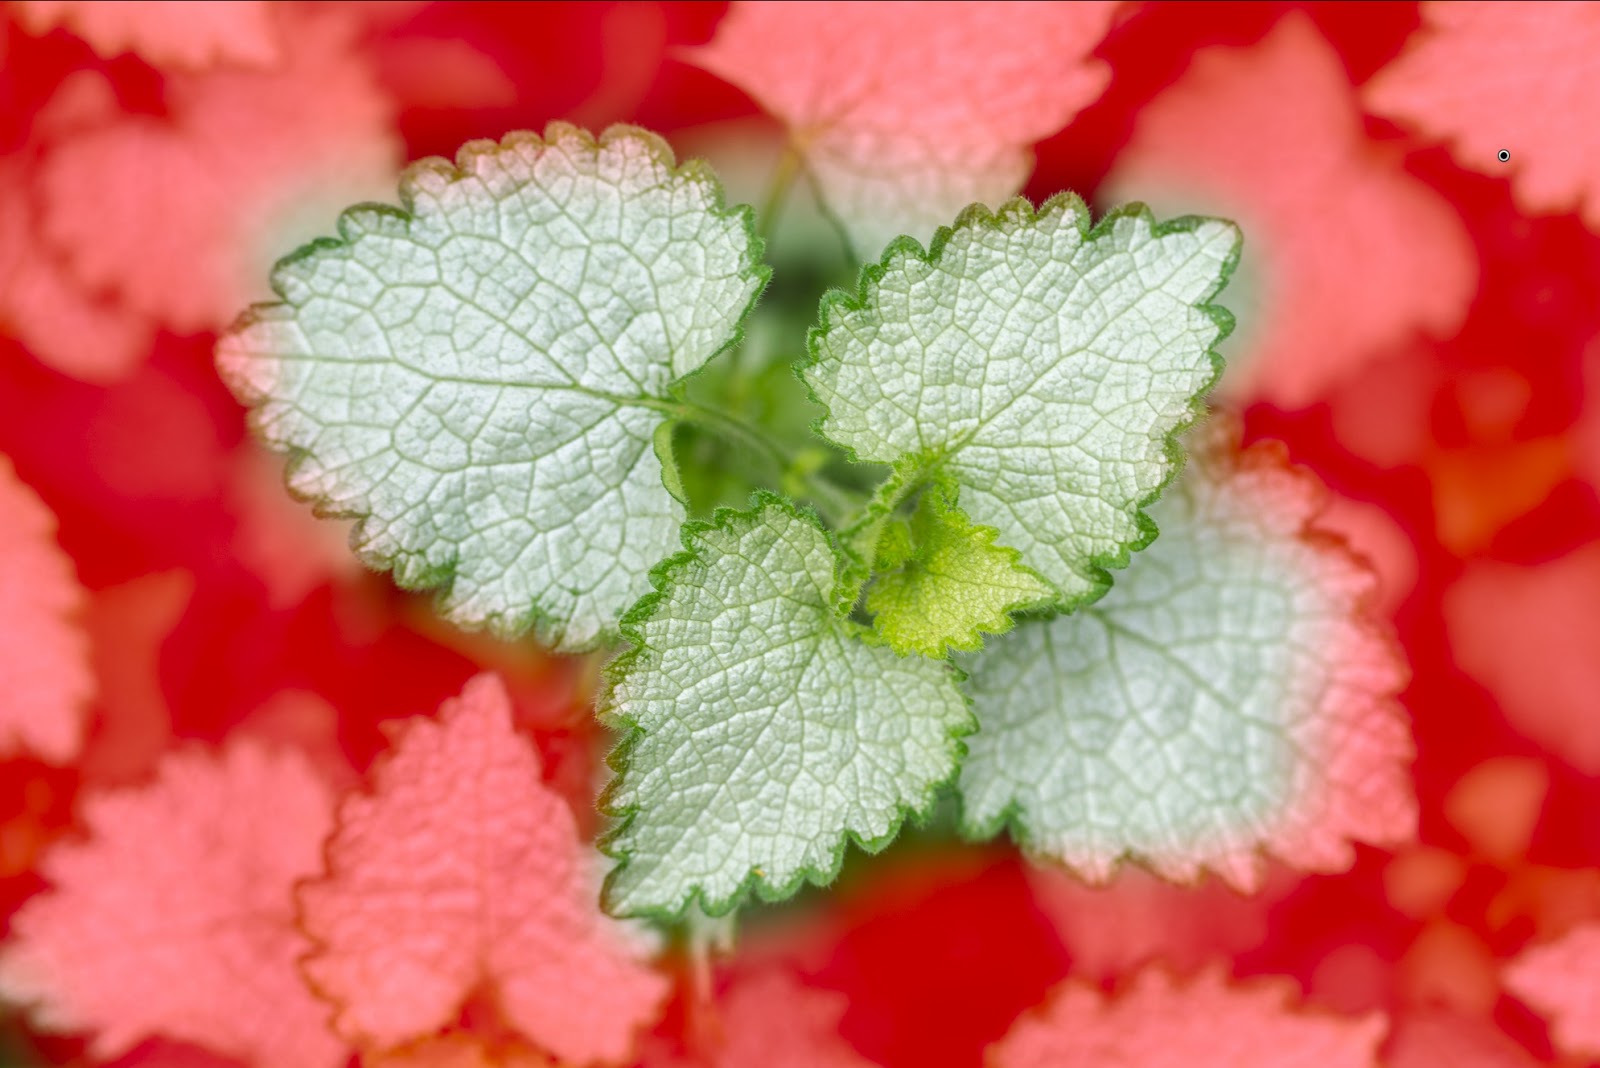 |
Figure 5.
Painting the area with Mask Overlay on. |
Begin to paint the areas that you want to de-emphasize or the background area where the effect will take place. In Figure 5, take care not to paint over the sharp edges. In this example you can see that one of leaves I painted over the edge because it is already part of a shallower depth of field. Much of the painting becomes subjective for you and I often find myself erasing areas as well. Holding the alt key will swap to the erase function and you might need to increase the size of the brush and adjust the feather settings to match. You might also find the 'pin' is distracting (especially if you have more than one mask), you can just hide it by hitting the 'H' key.
Your end results might need some minor adjustments, but what you should end up with is something that brings that foreground element more in focus while subtly blurring the background further.


Awesome use of the adjustment brush and great tutorial.
ReplyDelete